Is your kitchen the heart of your home, or has it become a cluttered chaos zone? If you’re constantly fighting for counter space and can never find the right lid for your pots, you’re not alone. A messy kitchen can make cooking feel like a chore instead of a joy.
But don’t worry, reclaiming your kitchen is easier than you think. I’ve gathered 20 practical and easy-to-implement ideas to help you declutter and organize your space. Get ready to transform your kitchen into a streamlined, functional, and peaceful area you’ll love spending time in.
1. Start with a Full Kitchen Audit
Before you buy a single organizer, you need to know what you’re working with. I recommend pulling everything out of your cabinets and drawers—yes, everything. This might seem overwhelming, but it’s the most effective way to see exactly what you own.
Once everything is out, sort it all into three piles: keep, donate, and toss. Be ruthless. That avocado slicer you haven’t used in three years? It’s time to let it go. This first step is crucial because organizing clutter is still clutter. Paring down your belongings will make every other step on this list significantly easier and more effective.
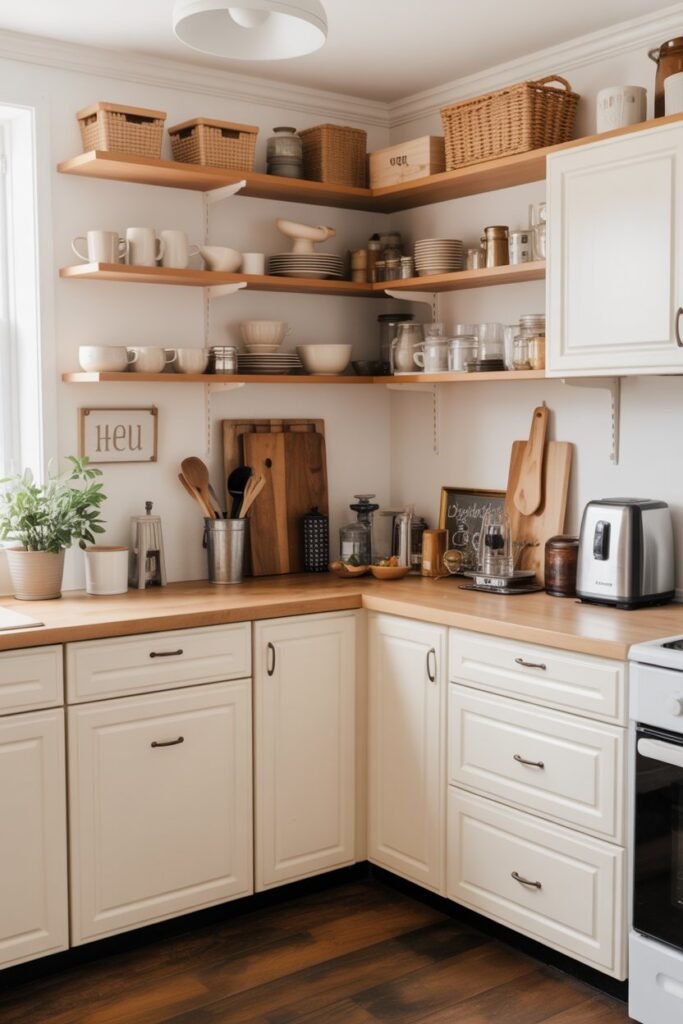
2. Think Vertically
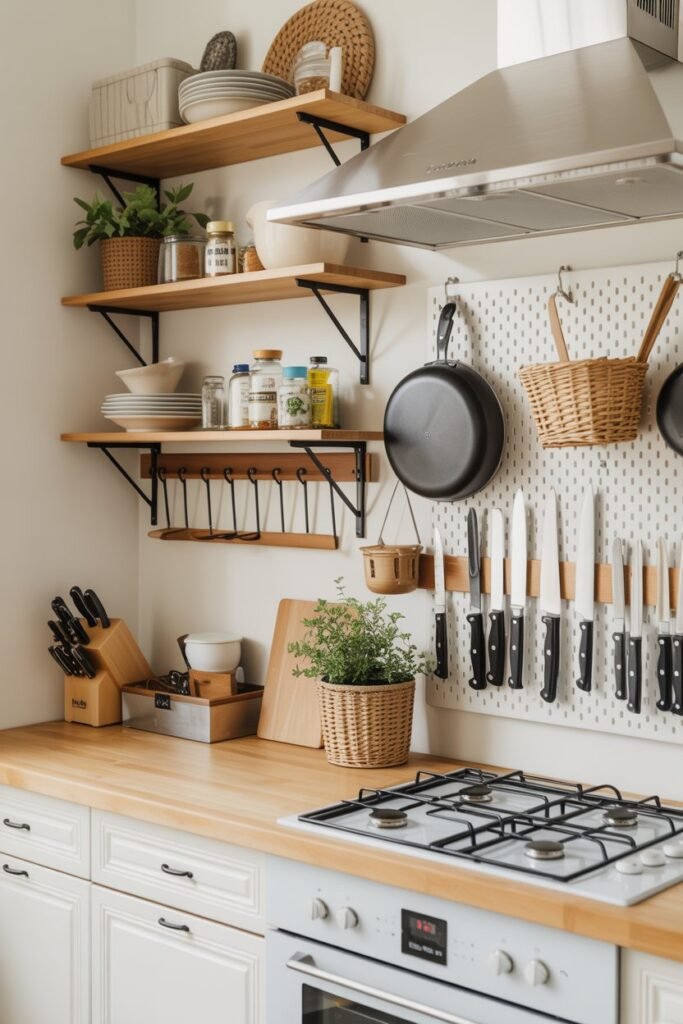
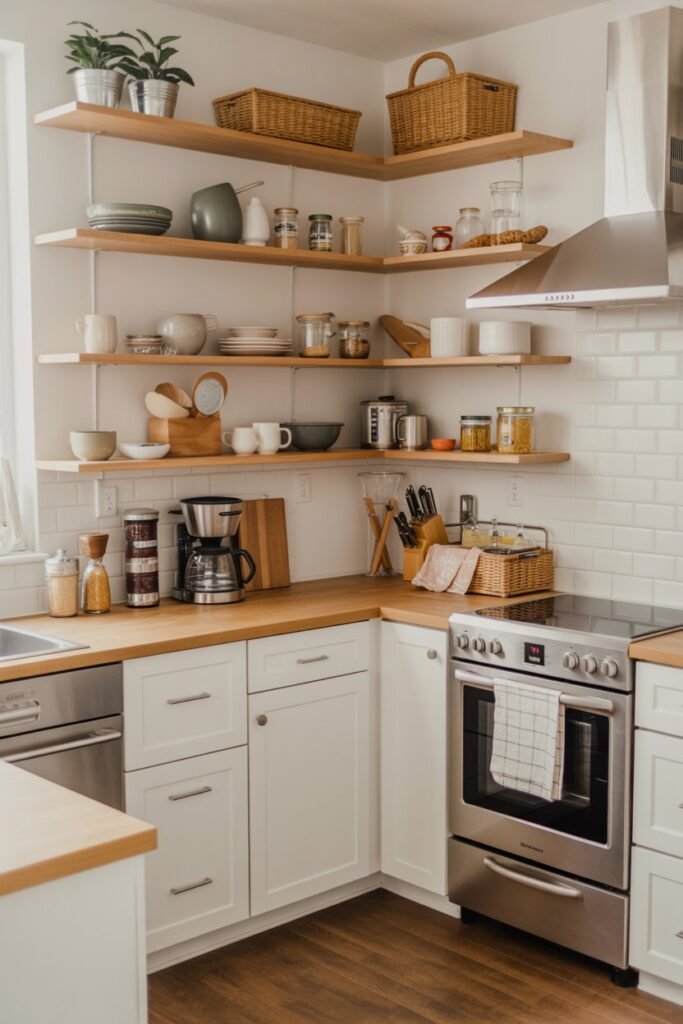
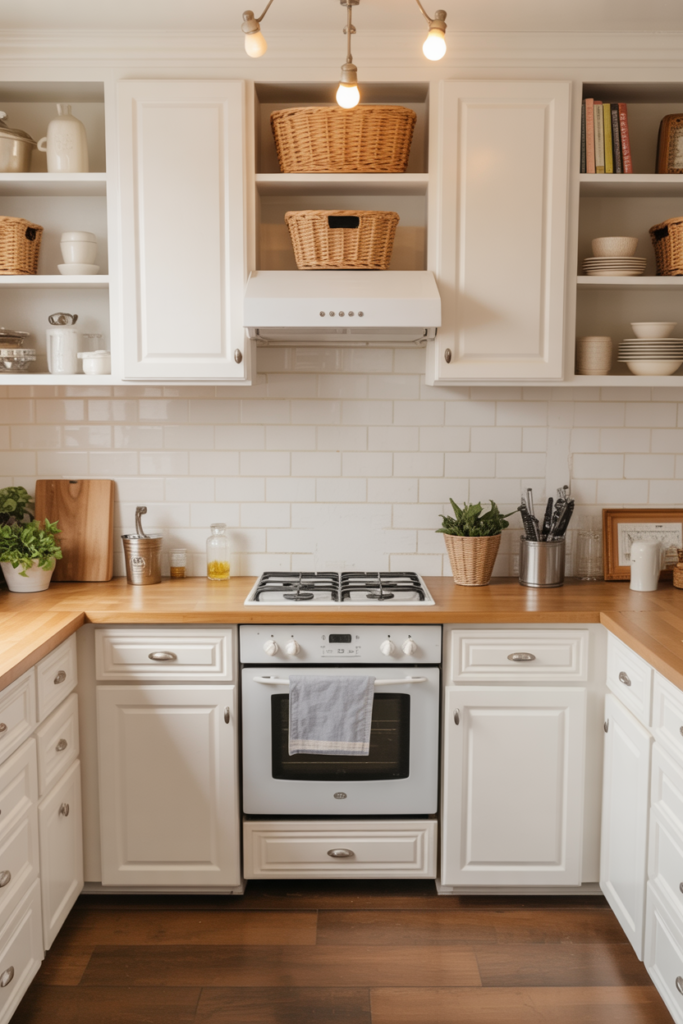
One of the biggest mistakes I see people make is not using the vertical space in their kitchen. The walls are prime real estate for storage! You can install floating shelves for everyday dishes or spices, which not only frees up cabinet space but also adds a decorative touch to your kitchen.
Another great idea is to use a pegboard. I love how versatile they are; you can hang pots, pans, utensils, and even small baskets for herbs. Magnetic knife strips are another fantastic way to get knives off the counter and onto the wall, keeping them safely within reach.
3. Zone Your Kitchen
Think about how you use your kitchen and create specific zones for different activities. I have a coffee zone with my coffee maker, mugs, and beans all in one spot. There’s a baking zone with flour, sugar, mixing bowls, and measuring cups grouped together. This approach saves so much time and energy.
When you’re unloading groceries or looking for an ingredient, you’ll know exactly where to go. Common zones include a prep area (near the sink and trash), a cooking area (by the stove), and a food storage area (pantry and fridge). This simple change makes your kitchen workflow much more intuitive and efficient.
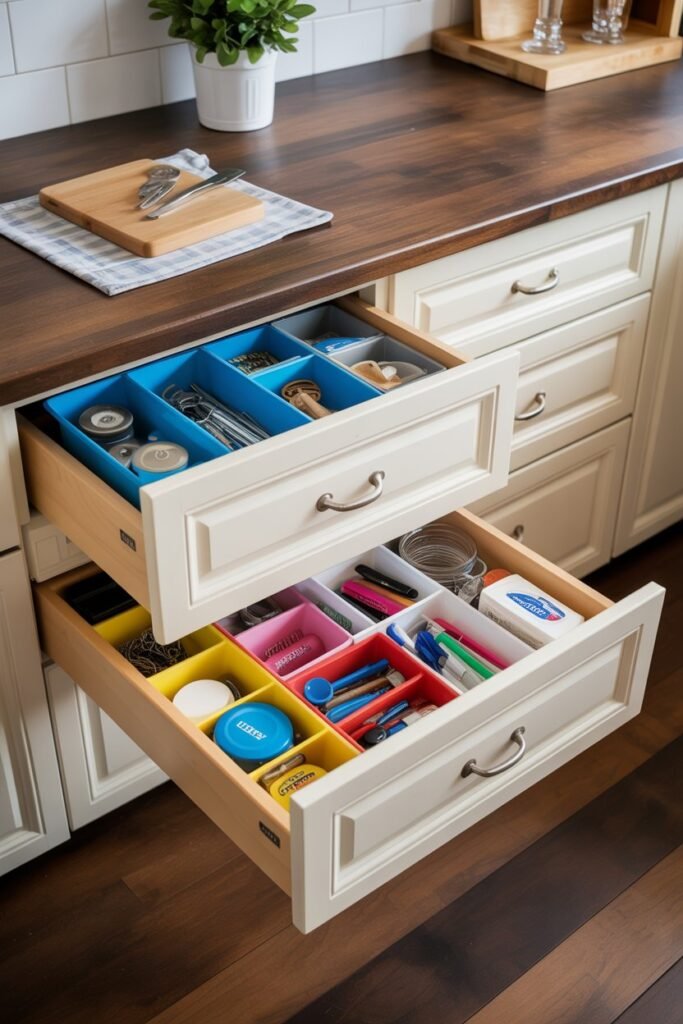
4. Use Drawer Dividers Everywhere

Drawers can easily become a jumbled mess of utensils and gadgets. That’s why drawer dividers are my secret weapon. They aren’t just for the silverware drawer; I use them for everything. You can find adjustable bamboo or plastic dividers that fit almost any drawer size.
Use them to separate spatulas from whisks, measuring spoons from bag clips, and cooking utensils from junk drawer items. This simple trick instantly brings order to your drawers, making it easy to find what you need without rummaging through a tangled mess. It’s a small investment that delivers a huge organizational payoff.
5. Decant Dry Goods into Clear Containers

Get rid of bulky, half-empty boxes of pasta, rice, and cereal. Decanting your dry goods into clear, airtight containers is a game-changer. Not only does it look incredibly neat and uniform in your pantry, but it also helps you see exactly what you have at a glance.
This helps prevent you from buying duplicates and also keeps your food fresher for longer. I make sure to label each container with the contents and the expiration date using a simple label maker or a chalk pen. This streamlined system makes pantry management a breeze.
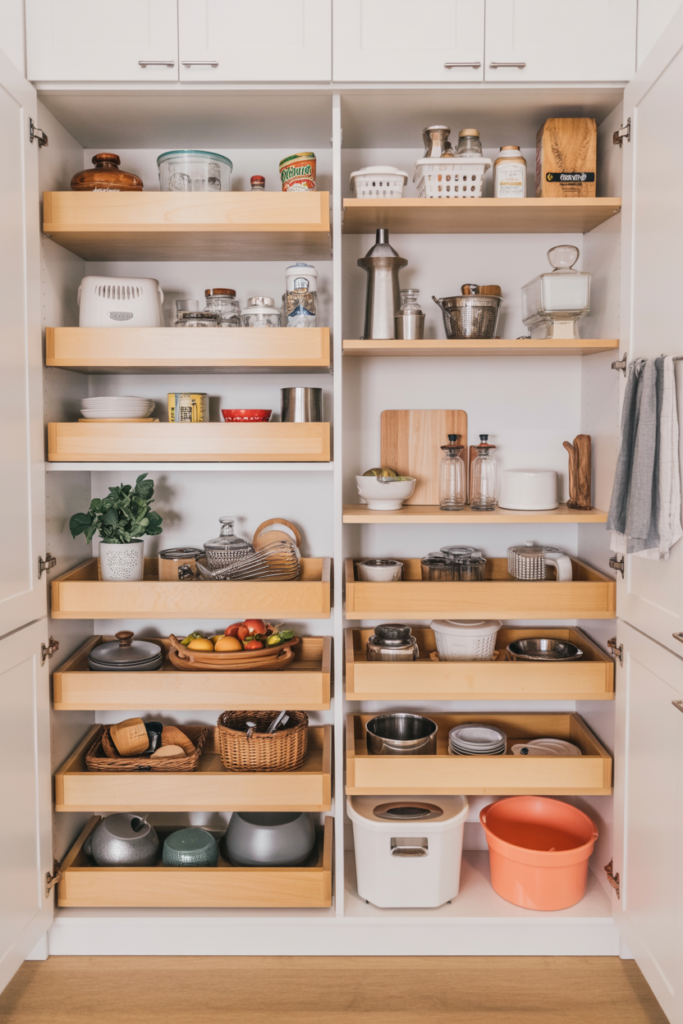
6. Maximize Cabinet Space with Risers
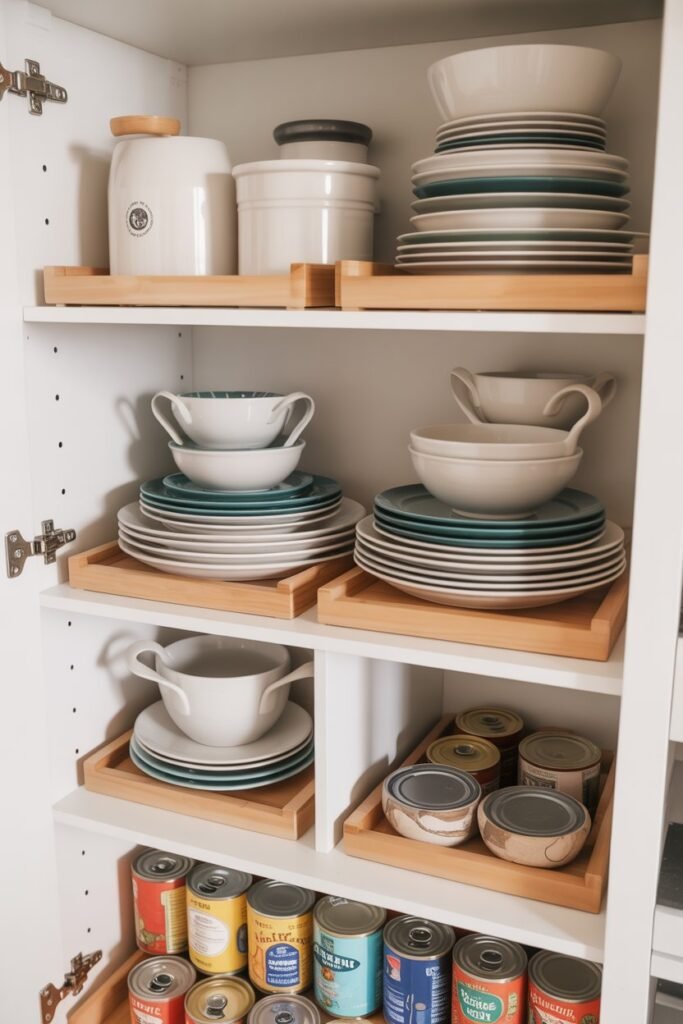
Your cabinets have more storage potential than you think. Shelf risers are a brilliant way to double the usable space on a single shelf. I use them to stack plates and bowls, creating two levels of storage where there was once only one. This prevents you from having to unstack a wobbly tower of dishes to get to the one you need.
You can also use them in your pantry for canned goods, allowing you to see everything without having to move items around. It’s a simple, inexpensive solution that makes a massive difference in how much you can fit into your cabinets neatly.
7. Create a Home for Lids
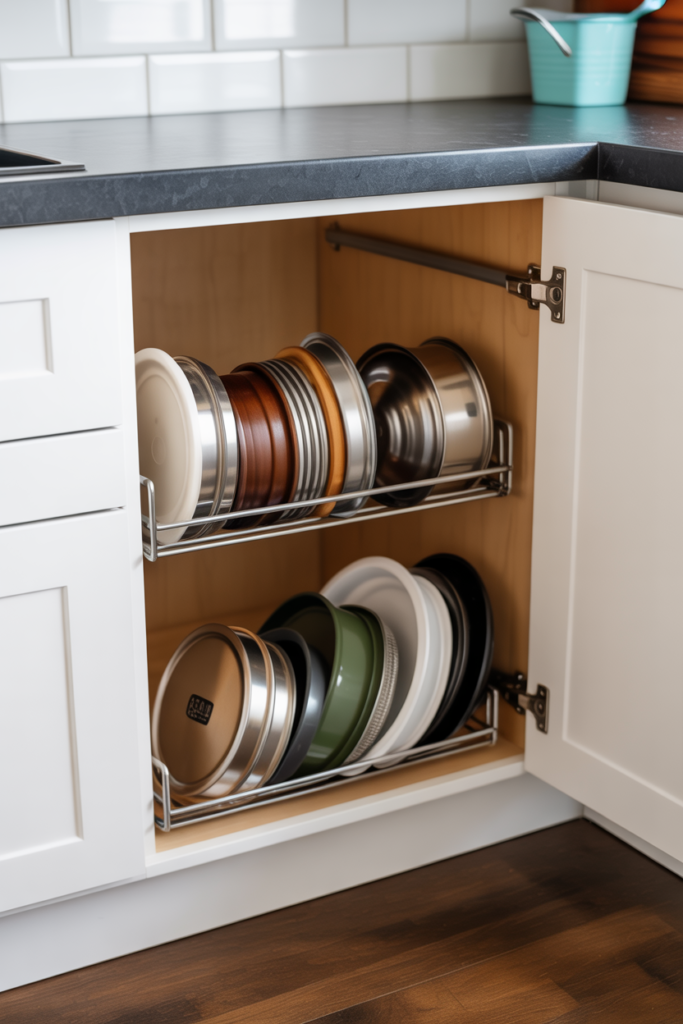
The eternal struggle of finding the matching lid for your food containers or pots is real. To solve this, I created a dedicated home for all lids. You can use a simple file organizer or a tension rod inside a deep drawer or cabinet to store them vertically.
This way, they are all visible and easy to grab. Some people prefer a dedicated plastic bin to toss them into. Whatever method you choose, giving lids their own spot stops them from taking over your cabinets and ensures you can always find the one you need instantly.
8. Utilize the Back of Cabinet Doors
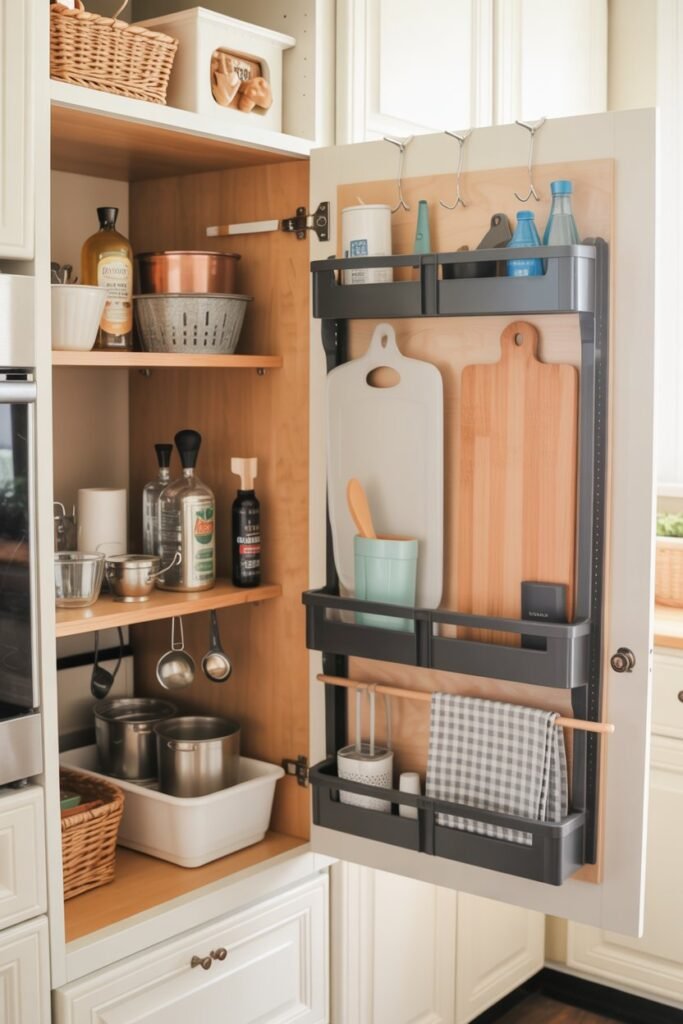
Don’t forget about the inside of your cabinet doors! This is often overlooked storage space. I use over-the-door organizers to store things like cutting boards, aluminum foil, and cleaning supplies. You can also install small hooks to hang measuring cups and spoons.
This frees up valuable drawer and shelf space for larger items. It’s a clever way to keep frequently used items accessible but out of sight. Just make sure the items you hang don’t prevent the cabinet door from closing properly.
9. Implement the “One In, One Out” Rule
Once you’ve decluttered, the key is to maintain it. The “one in, one out” rule is simple but powerful. Every time you bring a new kitchen item into your home—whether it’s a new mug, gadget, or small appliance—you must get rid of one old item.
This rule prevents clutter from accumulating again. It forces you to be more mindful about your purchases and ensures your kitchen remains at a manageable capacity. It’s a habit that will keep your space organized for the long haul, saving you from another massive decluttering session down the road.
10. Use Turntables (Lazy Susans) in Corners
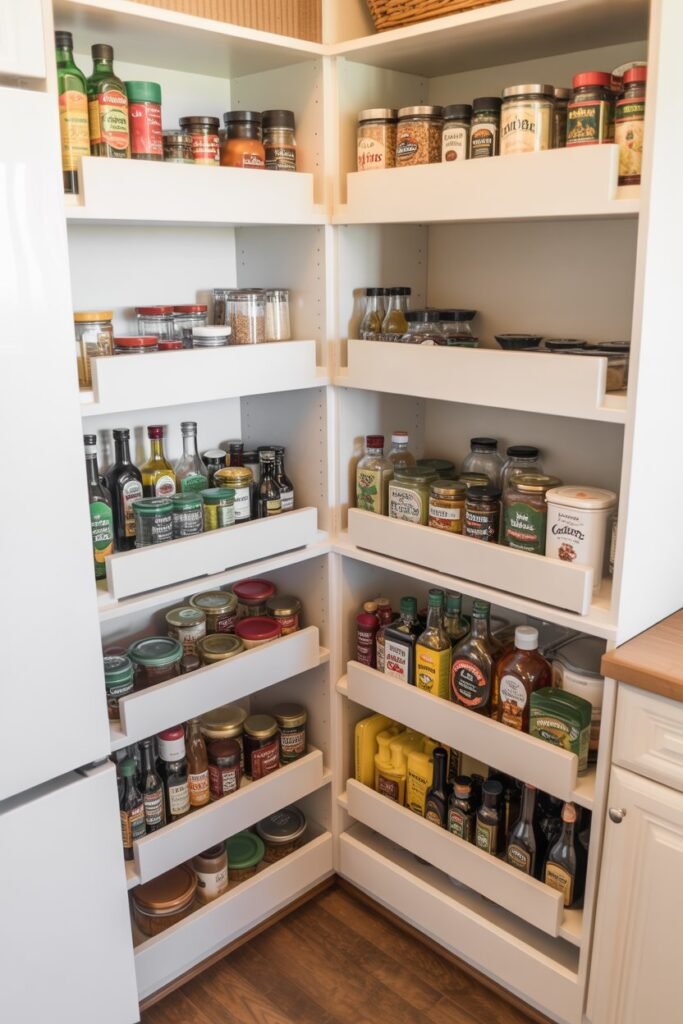
Corner cabinets can be awkward and deep, making it hard to reach anything in the back. A turntable, or Lazy Susan, is the perfect solution for this problem. I use them in my corner cabinets and on pantry shelves to store oils, vinegars, spices, and condiments.
With a simple spin, everything that was once hidden in the back is now front and center. This prevents items from getting lost and expiring, saving you money and reducing waste. They are also great for the refrigerator to keep jars and bottles organized.
11. Designate a “Junk Drawer” (But Organize It)
Let’s be realistic—every home needs a junk drawer. It’s the catch-all spot for pens, rubber bands, batteries, and other miscellaneous items. But that doesn’t mean it has to be a chaotic mess. The key is to organize the chaos.
I use small, interlocking drawer organizers to create compartments for each type of item. This way, everything has a designated place, and you can find what you’re looking for without digging. An organized junk drawer gives you the convenience of a catch-all space without the stress of the clutter.
12. Go Digital with Recipes
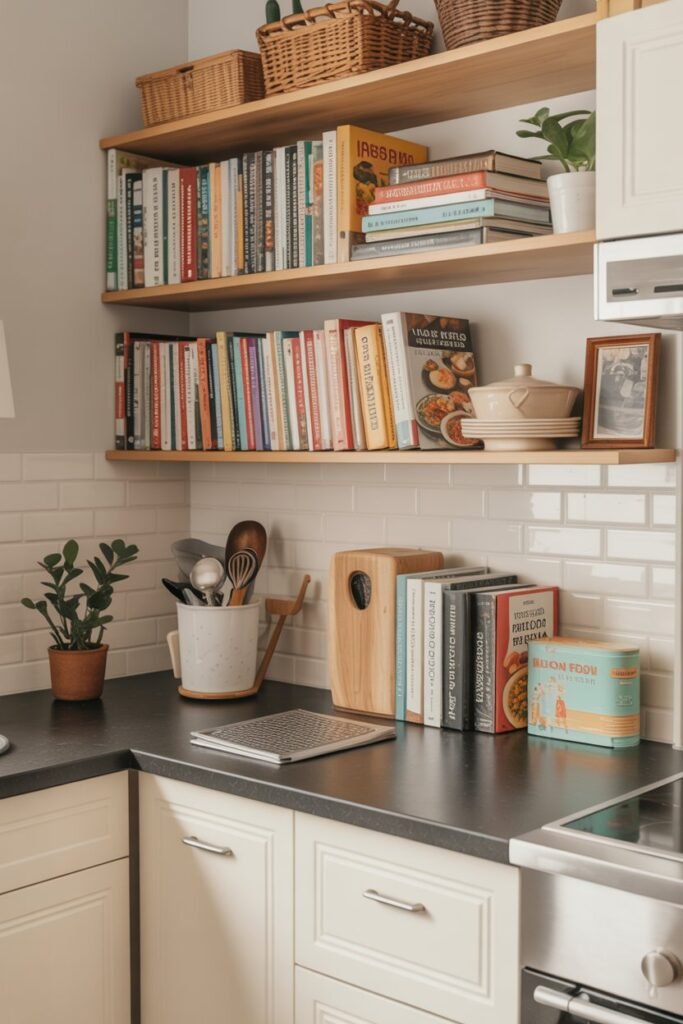
Are you hoarding stacks of cookbooks or loose recipe clippings? It might be time to go digital. Scanning your favorite recipes or using an app like Paprika or Pinterest allows you to store thousands of recipes without taking up any physical space.
This not only declutters your countertops and shelves but also makes finding a specific recipe much faster. You can organize them by course, cuisine, or occasion. If you can’t part with your physical cookbooks, try limiting your collection to a few cherished favorites that you use regularly.
13. Tame the Tupperware
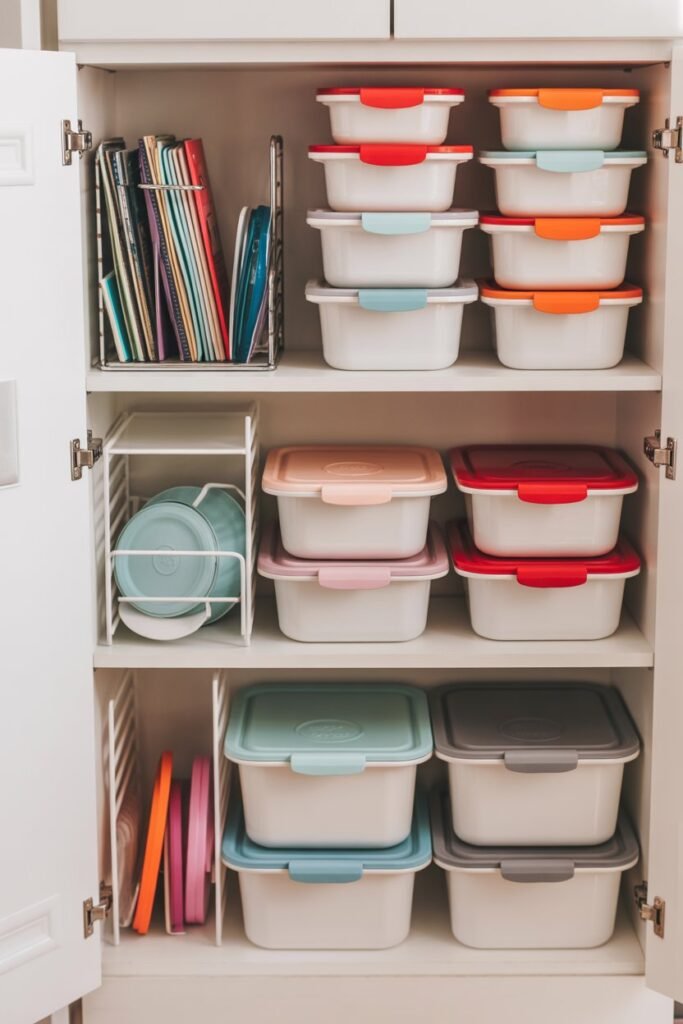
The cabinet of mismatched food containers is a common source of kitchen frustration. To tackle this, I first got rid of any containers without a matching lid. Then, I invested in a set where the lids are interchangeable and the containers nest inside each other.
This saves a tremendous amount of space. I store the containers nested together and use a separate bin or a file holder to organize the lids vertically next to them. This system ensures you can always grab a container and its corresponding lid without an avalanche.
14. Keep Counters as Clear as Possible
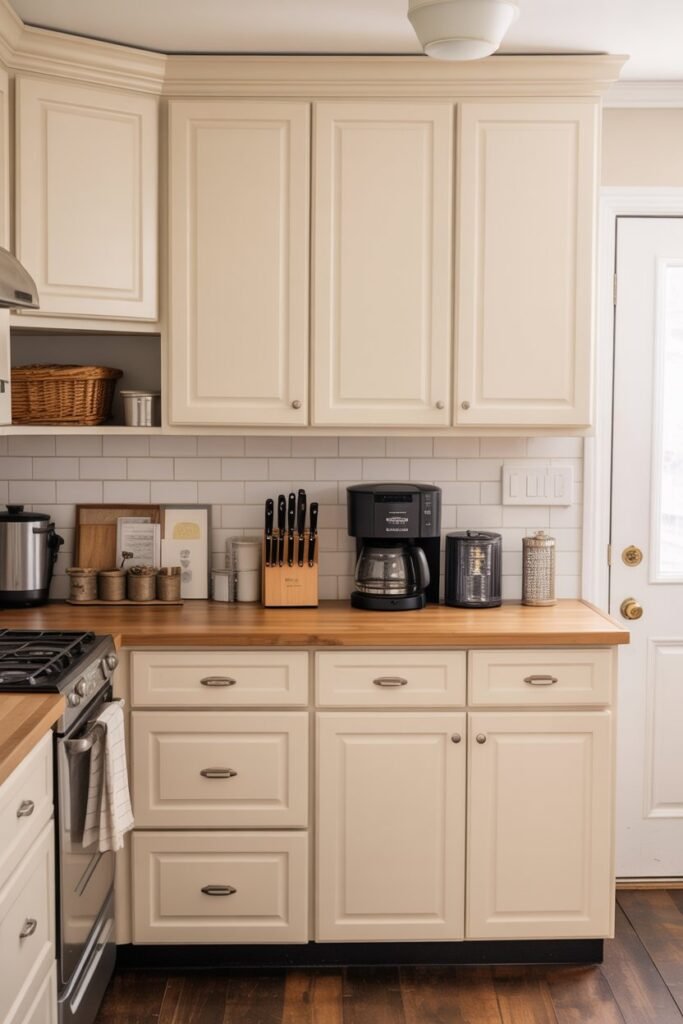
Your countertops can quickly become a dumping ground for mail, keys, and other non-kitchen items. I make a conscious effort to keep my counters as clear as possible. The only things that earn a permanent spot are items I use every single day, like my coffee maker and a knife block.
Everything else is stored away in a cabinet or drawer. This not only makes the kitchen look cleaner and more spacious but also gives you more surface area for meal prep. Create a designated spot near the door for mail and keys to prevent them from landing on the counter.
15. Create a Cleaning Caddy
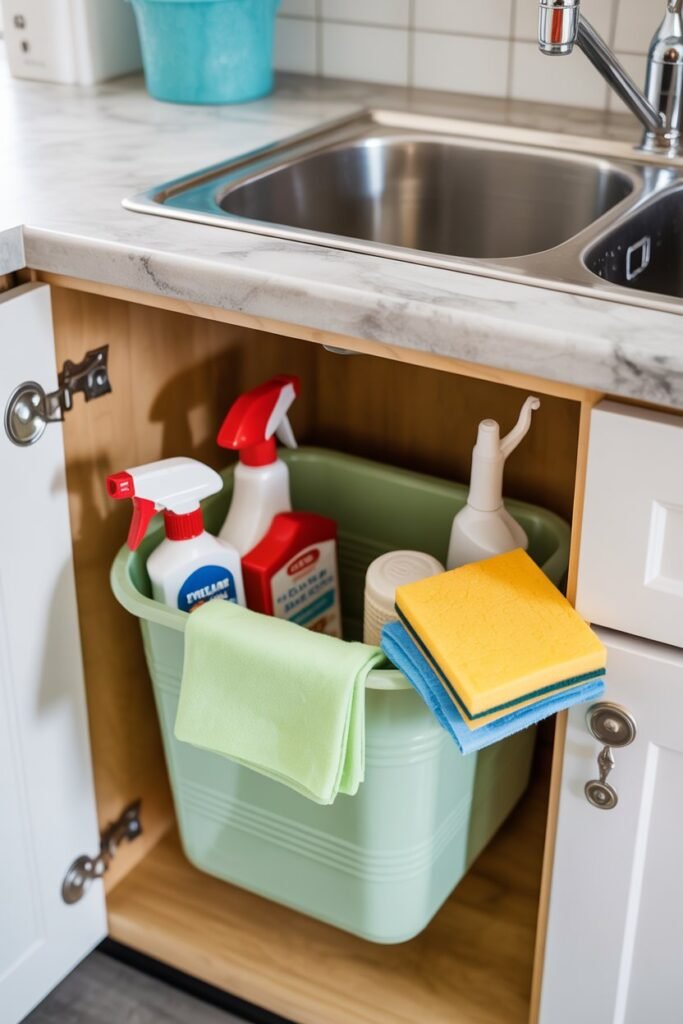
Keep all your cleaning supplies in one place by creating a portable cleaning caddy. I have a small bucket under my sink that holds my all-purpose spray, sponges, microfiber cloths, and dish soap.
When it’s time to clean the kitchen, I just grab the caddy and have everything I need. This saves me from having to search for different products under the sink or in other parts of the house. It’s an efficient system that simplifies your cleaning routine.
16. Use a Rolling Cart for Extra Storage
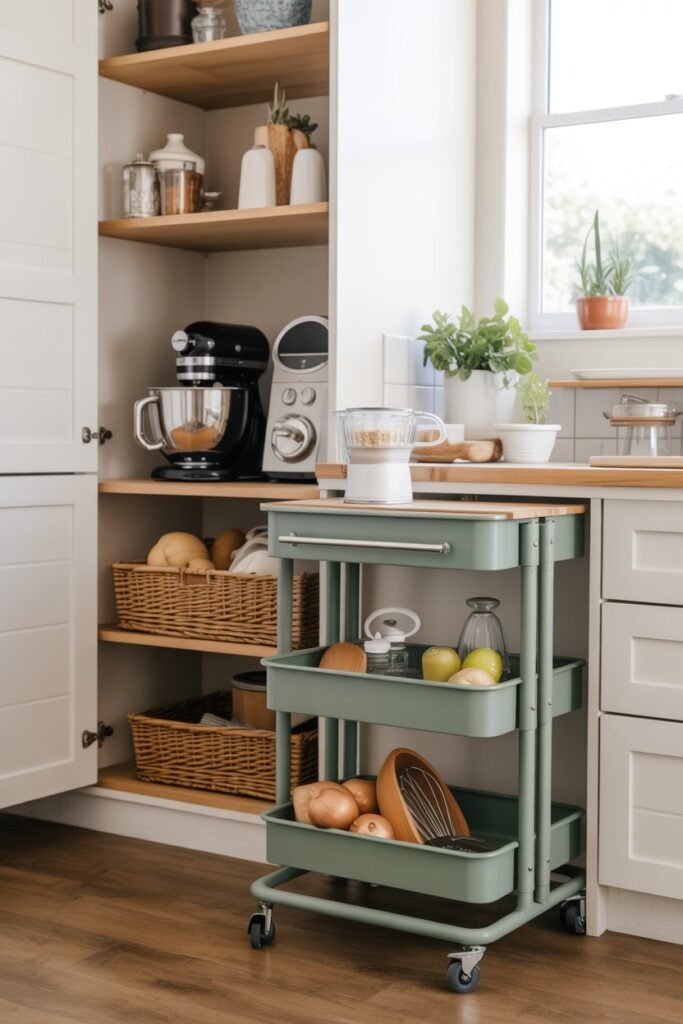
If you’re short on cabinet or pantry space, a rolling utility cart is a fantastic and flexible solution. I use one to store my small appliances like my stand mixer and air fryer, which frees up a ton of counter space.
The beauty of a cart is its mobility. You can roll it out when you need it and tuck it away in a corner or closet when you don’t. It can also serve as a mobile coffee bar, a baking station, or extra storage for produce like potatoes and onions.
17. Organize Your Fridge and Freezer
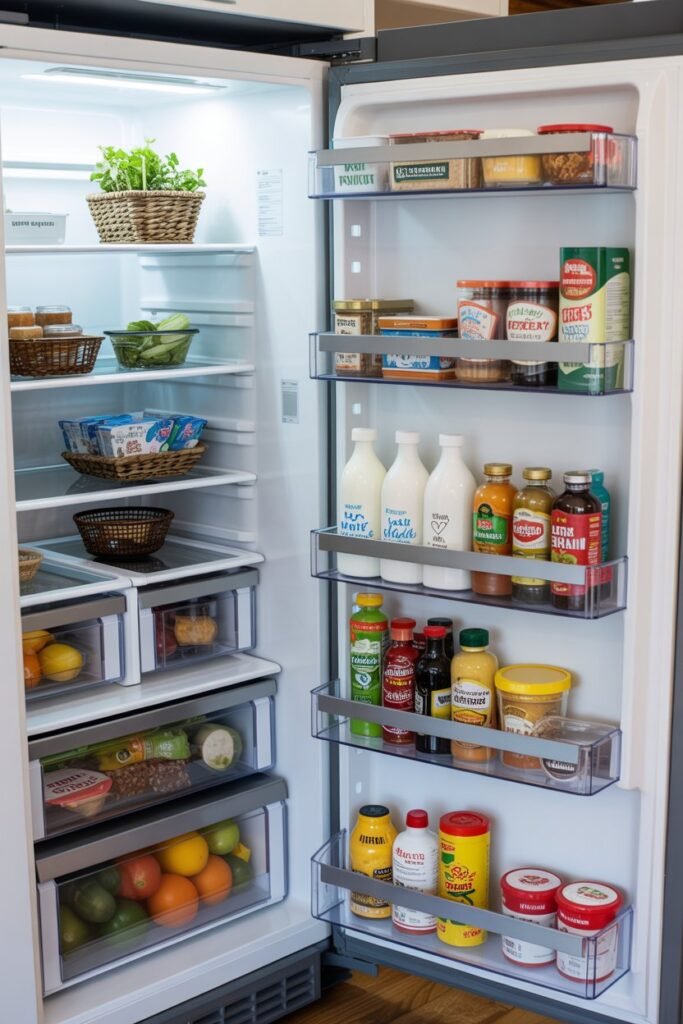
Don’t stop at the cabinets and pantry; your fridge and freezer need love too. I use clear bins to group similar items together in my refrigerator—one for yogurts, one for condiments, one for snacks. This makes it easy to see what I have and prevents things from getting lost in the back.
In the freezer, I use stackable bins to separate frozen vegetables, meats, and pre-made meals. I also make sure to label and date everything to avoid mystery frozen items. An organized fridge and freezer reduce food waste and make meal planning much simpler.
18. Consolidate Your Mugs and Glasses
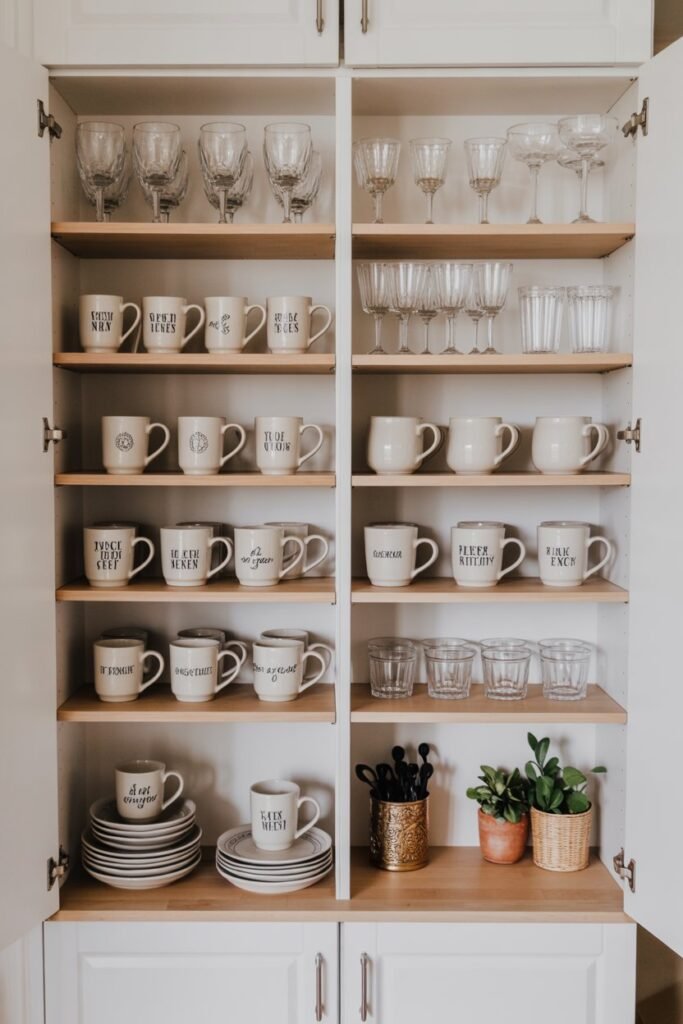
Mugs and glasses have a way of multiplying. Take an honest look at your collection. Do you really need 30 different mugs? I recommend keeping only your favorites and enough for guests, and donating the rest.
Once you’ve pared down, organize them neatly. I store my everyday glasses on an easily accessible lower shelf and the special occasion glassware up high. This not only frees up cabinet space but also makes your collection look more intentional and curated rather than cluttered.
19. Declutter the Top of Your Fridge
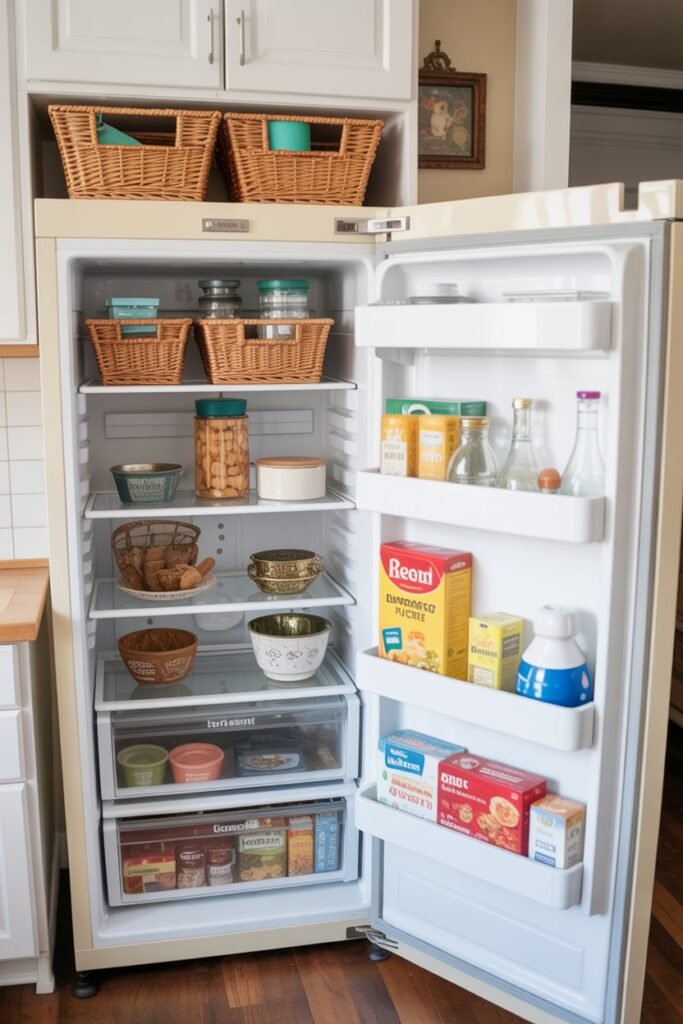
The top of the refrigerator is not a storage shelf. It tends to collect dust, grease, and clutter, making your whole kitchen look messy. I make it a rule to keep this space completely clear.
If you are truly desperate for storage space, use one or two attractive, lidded baskets to store infrequently used items. This will look much more deliberate and tidy than a random assortment of cereal boxes and appliances. But ideally, this surface should be empty for a cleaner, more streamlined look.
20. Schedule Regular Mini-Decluttering Sessions
Finally, organization is not a one-time project; it’s an ongoing habit. To keep your kitchen in top shape, I suggest scheduling a quick 15-minute decluttering session once a week. Use this time to put things back in their proper homes, wipe down counters, and sort through any mail or papers that have accumulated.
This regular maintenance prevents clutter from building up and saves you from needing a major overhaul every few months. It’s a small commitment that keeps your beautifully organized kitchen looking its best all the time.
Ready to take control of your kitchen but need a little more guidance? A well-organized kitchen starts with a smart plan. Check out our customizable kitchen planners to help you map out your zones, track your inventory, and create a space that works for you.
I’m Jasmin Otto — a foody girl who truly loves food. I’m passionate about cooking, exploring new flavors, and sharing healthy yet delicious recipes here on foodieeshe.com. I also love beautiful kitchens and enjoy sharing décor ideas that make cooking spaces warm, stylish, and inspiring.